Thursday, January 31, 2013

Screen: Multitasking in the command line

Multitasking Octave and Python with Screen. (Don't ask why, it's an example)

"Screen is a full-screen window manager that multiplexes a physical terminal between several processes, typically interactive shells." - definition from GNU Screen website.

As the definition says Screen allows you to run multiple processes/shells in one terminal, this is priceless when you are sshing a remote server. However you can use the powers of Screen to do some command line multitask in your everyday life.

I'll cover how I use both Screen and the the Gnome Drop Down Terminal (alternatively Guake can also be used). If you use Guake, you might say: "but I already have tabs in Guake, I don't need Screen". That's as debatable as the topic of Buffers vs Tabs in Vim, but everybody knows that Buffers beat Tabs everyday (OK, that's just my opinion).

Basics of Screen


Install Screen from your distro repository if you haven't already. And let's see what Screen can do.
# Try this command
screen
Notice the gnome-terminal screen now says "screen" in the title.

Some splash screen appears, you press enter and then looks like nothing happened... But something did happen, you are now in a Screen session!
# Try this command on your current window
top
You'll now see your running processes order by CPU usage. Now type: 'C-a c' (press both Ctrl and A, release both keys and then press the C key).

Creating a new window in a Screen session.

You have just created a new window and you watching this second window. The command top is still running in the first window, just that is not visible. You can switch between these two windows using 'C-a n' or 'C-a p'.

Finally, you can "kill" a window using the command 'C-a k'. You'll see a prompt at the bottom, asking if you really want to kill window. Killing a window also terminates the process contained in it.

Killing a window an a Screen session.

There are other commands, you can learn more about them using the help command 'C-a h'. There is another important feature of Screen named attaching/detaching, which is extremely useful for ssh connections, but I won't cover that here as it's not necessary to do the multitasking, as you'll see soon.

How do I know if I'm in a Screen session?


I can't visually tell whether I'm in a Screen session or not.

If you run screen inside a a GUI terminal like the gnome-terminal, is easy to notice that you are in a Screen session because the title changes to "screen". On Guake is also easy to notice, as the tab name changes to "screen" accordingly.

But on the Gnome Drop Down Terminal you've got no way to tell. You can't tell either if you are on an X-less login session. At less not visually, but you can always test if 'C-a h' displays the Screen help.

A better way of telling Screen session apart is adding a status line, this line can also display other important information. Before adding that feature, we need to lean about the screenrc file.

screenrc


As with many other applications, Screen has a rc file that executes certain commands at every startup, you can think of it as a configuration file. We'll work with the .screenrc file found in your home folder, that rc file only works with your current user account.
# Creating/editing the screenrc file
vim ~/.screenrc
To turn off the startup message you can add this line to your .screenrc file:

Screen status


To add a nice status line to Screen, you must append the following lines to your .screenrc file. (Source: Arch Linux Forums)
The Screen status line displays the hostname, a list of windows, the date and the time.

Launching a set of applications on every Screen call


To start Screen with multiple windows and each window containing an application, add the following lines to your .screenrc file.
On Screen the windows are numbered starting from 0. The final command selects which window will be active at startup.

For example, to start Screen with two windows, the first containing octave and the second containing the shell; and start with the shell window active, you'll need the following lines:
Start Screen with Octave and a shell (zsh in this example)

Keybindings


Remember the command we tested at the beggining of this post? Well, we can map them to single keys for faster accessing. The following lines do just that, append them to your .screenrc:
Each keybinding has a description right next to it, for your reference.

Drop-down Multitasker Terminal


As a final step let's integrate Screen to a drop down terminal for the ultimate command line multitasking experience.

Gnome Drop Down Terminal


For the Gnome Drop Down Terminal, the process is straightforward: Simply head to the preferences of the extension and select screen as the custom command to run instead of the shell.

Use Screen instead of the default shell in the Gnome Drop Down Terminal

Gnome Drop Down Terminal + Screen

Guake


You can start Guake with some applications in it at startup as I explained in an old post (I used Octave as an example in that post). But using Screen and the .screenrc file is way simpler!

You'll need to run 'guake -e screen' instead of just guake, and the screenrc file will take care of launching your apps.

The easiest way is to configure Guake as a startup application.

Launch Guake with Screen inside it at startup.

Screened Guake

I hope this post was useful to the heavy users of the command line and also pushes the casual users to get into it.

Vim for Python Development

Testing a PyOpenCL demo in vim.

This is my collection of hacks that turn vim into a python IDE.

Syntax Highlighting


I'm using Arch Linux and Syntax Highlighting comes installed with my Vim package. I just need to enable the syntax highlighting in my .vimrc file:

Enable line numbers


Is as simple as adding this line to the .vimrc

Indentation


Adding this to the .vimrc file will enable PEP8 indentation only for *.py files.

Autocompletion


I use the great jedi-vim plugin from David Halter and the SuperTab plugin. You can find the installation steps at RedKrieg's post: Writing Python like a Jedi.

Testing the jedi-vim plugin

Executing python code inside vim


This is my favorite, press the F5 key to save the python script and execute it. Add this to the .vimrc file.

Enable file specific features


To enable all the filetype features I've defined above the following lines are needed in the .vimrc file.

Other plugins


Here is a collection of other useful plugins, I recommend installing them using pathogen if you can't get them from the repositories of your Linux distro.


If you have hacks of your own, please share them with everyone in the comments section.

Tuesday, January 29, 2013

Demo: STM32F4 + OV7670 + qSerialTerm

Yup, that mess of wires actually works.

In this post I'll cover 3 basic demo programs for the STM32F4 to interface the OV7670. Additionally, I've use qSerialTerm to receive data from the uC and display it in a human readable form.

I assume you know how the OV7670 works and have some knowledge about common peripherals found in uC (GPIO, USART, DMA, etc).

The board used in this demo was the custom development board: F4Dev. The STM32F4DISCOVERY wasn't used and can't be used because the Digital Camera Interface (DCMI) peripheral pins are not fully available in that development board.

I've used bareCortexM, an Eclipse based IDE, and libstm32pp, a template peripheral library, to develop these demos for the STM32F4.

The following configuration applies to all the demos:
  • The STM32F4 operated at 42 MHz, the system clock, the AHB clock, the APB1 clock and the APB2 clock, all of them operated at this frequency.
  • This 42 MHz frequency was obtained from the uC High Speed Internal (HSI) oscillator, which runs at 16 MHz, after scaling up the frequency using the uC internal PLL.
  • The MCO1 pin was configured to output the HSI clock (16 MHz) and this output was used to drive the OV7670 XCLK.

Demo 1: Scanning the SCCB bus (Code)


In this first demo, the STM32F4 will interface the OV7670 using a bit bang implementation of the SCCB protocol.

The uC will wait until the letter 'S' is received on the USART1 interface. Upon receiving this signal, the uC will read all the internal registers of the OV7670 using the SCCB interface.

After scanning all the OV7670 registers. The uC will report the address and values of the registers via the USART1 in a human readable format.

Default values of the internal registers of the OV7670

You can find the log file of the uC output here.

Under the hood details: The formatting was done using the printf function.

Demo 2: Reading a frame and visualizing the data in hex format (Code)


In this second demo, the STM32F4 will interface the OV7670 using the Digital Camera Module Interface (DCMI) to grab a frame from the OV7670 and then display the data in hexadecimal format.

The uC will wait until the letter 'S' is received on the USART1 interface. Upon receiving this signal, the uC will use the DCMI in single shot mode to grab one frame from the OV7670.

After capturing the frame, the uC will send all the data via the USART1 interface in a human readable hexadecimal format.

Frame taken in a pitch black environment. Data in hex format.

You can get the full log file here.

Under the hood details: The DCMI peripheral works hand to hand with the DMA peripheral. The data that is captured by the DCMI is moved by the DMA to a predetermined memory address without intervention of the uP. The formatting was done using the printf function.

Demo 3: Reading a frame and visualizing the data as an image (Code)

The last demo is pretty similar to the second demo. The difference is that the uC reports the frame data in binary form. On the PC side, this binary data is parsed and displayed in qSerialTerm.

Frames captured by the OV7670. Left: A electrical tape. Right: Pitch black image.

Under the hood details: After capturing the frame, the data was sent through the USART interface using the DMA peripheral.

That's it. You have access to my full code, both the STM32F4 firmware and the qSerialTerm are fully available to you. I hope this information will help you in projects that involve the OV7670.

Monday, January 28, 2013

Augmenting Octave with Vim

Integrating the powerful mathematical package, Octave, with the flexible editor, Vim.

Today, I'm sharing some tips to use the vim editor inside the Octave interactive command line.

The octaverc file


The first thing towards customizing Octave is creating an .octaverc file, if you don't have one already. The .octaverc file holds some Octave commands that are executed every time you launch Octave.

We'll work with the .octaverc file that lives in your home directory, which is user specific.
# Create/modify .octaverc in your home folder
vim ~/.octaverc
A good starting .octaverc file looks as follows:

Using vim as editor in Octave


Next, let's set vim as the default editor in Octave. (source of information)
# Add extra configuration
vim ~/.octaverc
Open the .octaverc file and append the following:
Now you can call vim from within Octave, and use it in command line mode, i.e. without opening an (unnecessary) additional window.

As a bonus you get a function template.

Now, let's tweak vim for extra features!

Adding syntax highlighting


We'll add syntax coloring/highlighting to vim. Similar to the .octaverc file, vim also has a configuration file named .vimrc. Before touching the .vimrc file, you'll need to grab a vim syntax file from here (grab the latest version).

Next you'll need to drop that octave.vim file in the following directory: ~/.vim/syntax.
# If you don't have the folders already
mkdir -p ~/.vim/syntax
mv /path/to/downloaded/octave.vim ~/.vim/syntax/octave.vim
Next, you'll need to append the following lines in your .vimrc file.
Let's try editing a file inside Octave again.

Added Octave syntax highlighting for vim.

Execute Octave scripts from within vim


Here is where the magic comes in. With this hack, you'll be able to test the octave script you are editing in vim, inside vim and without leaving vim. In other words, you'll be able to use the F5 key to run your script, just like you do in the Matlab editor.

Without further ado, you'll need to add this to your .vimrc
Let's test the magic.


Executing an Octave script from within vim using the F5 key in normal mode.

I need to inform you that this hack adds two extra lines of code to your script:

"pkg load all" at the beginning of your code. Which grants access to all functions inside the extra Octave packages.

"pause" at the end of your code. Without this you won't be able to see the plots drawn in your script.

When the execution of the script finishes, these two lines are removed.

That's all folks, happy coding!

Saturday, January 5, 2013

Simmechanics: Simulating floor interaction/collision


I'll demonstrate how to simulate a floor in Simmechanics, this floor will prevent free falling (6 DOF) objects from falling below a threshold level ("the floor level"), i.e. I will simulate a collision/interaction between the free falling object and the floor.

I'll assume you have a basic understanding of how Simmechanics works. If you don't, you might want to check this post.

The problem


If you have used Simmechanics before, then you know it's an excellent toolbox for simulation of multibody dynamics. You can easily work with robotic arms, which are always fixed to the ground. But what happens when you want to work with legged robots, that can't be fixed to the ground. Well, then you run in a problem, if you don't fix any part of the robot to the ground, then the robot will fall and fall by action of the gravity. Removing the gravity is not an option, because you want to design the controllers of your robot with gravity compensation, even worse your robot will float if you simulate a zero gravity environment.

Let's develop a minimal model to illustrate the problem: a 6 DOF ball.

Illustrating the problem


We'll start by drawing the floor. Implement the following block diagram in Simulink.

Block diagram to visualize the floor.

Modify the Floor block parameters to match the following image, and also on the Visualization tab change the Body geometry option to "Equivalent ellipsoid from mass properties".

Parameters to draw a 1 meter radius floor.

Next, start a simulation. Activate the the Isometric View and the "Enable Automatic Expanding Fit".

Animation showing the floor as a 1 m radius disk.

Now, we add the free falling ball. Add more blocks to the model to match the following diagram.

Added a free falling ball to the model.

Next, modify the parameters of the Above Ground block and the Ball block, to match the following images. On the Visualization tab of the ball block also select "Equivalent ellipsoid from mass properties" on the Body geometry option.

Above Ground parameters
Ball parameters

Now simulate the system and observe the problem.

Ball falling through the floor.

The Idea


Known the problem, we must now create a solution. Let's begin by analyzing how the floor behaves. Ideally the floor is a rigid body that exerts enough force over adjacent bodies to prevent them from falling through. Now, perfect rigid bodies doesn't exist in the real world, all bodies deform when stressed or compressed. This means our floor model must be elastic, this can be modeled as a spring.

Our floor model can't be modeled only as a spring, otherwise will end with a trampoline. When we fall to the ground, we don't jump back to the sky, instead our potential energy dissipates as heat or as permanent deformation. This means our floor model must also have a dissipation element.

A mass-spring-damper system.

That description resembles a lot to a mass-spring-damper system. As you might know those system tend to vibrate, unless they are overdamped. This means our floor model must behave as an overdamped mass-spring-damper system. The final condition is that the free falling object must be the mass of the system, this means that our floor model doesn't really has a mass parameter. Other way to think of it is that the mass is detachable, and this mass is only affected by the spring and the damper when is at or below the floor level.

Implementing the floor interaction


First, let's enable some sensor/actuator ports on the free falling ball. These two ports must be located at the same point, at the bottom of the ball.

Adding sensor/actuator ports to the free falling ball.

The floor control diagram can be implemented as follows:

Floor Control Diagram.

The body sensor is configured to output the position in meters, while the body actuator is configured to exert force in newtons over the ball. Using a demuxer, we extract the Y component of the position, then we compare it to the floor level. If the Y position of the bottom of the ball is below the floor level, then we activate the spring-damper system represented by the gains 'k' and 'c', otherwise the floor exerts no force over the ball. The force developed by the spring damper system is exerted over the ball but only in the Y direction, thanks to a muxer and the body actuator.

The final step is selecting 'k' and 'c'. You need to considerate the following things:

  • The damping ratio "c / 2 / sqrt(m * k)" should be greater than 1, to guarantee overdamping.
  • The free falling body will sink a distance "m * g / k" into the ground, so you might want to increase 'k', right?
  • But Increasing 'k', also increases the computation load of the simulation.

How do I select the parameters 'k' and 'c'? I first select 'k' balancing how much sinking and computation load can I tolerate. Then I compute 'c' using the biggest mass and choosing a damping ratio of 1.

The Results


I'll leave you with the simulation output.

Floor control enabled.

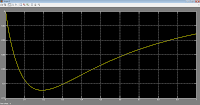
Ball interacting with the floor. (Y position)

As a closing remark, I must say that I have used this method in the simulation of a humanoid robot with positive results.

Simmechanics: Simulating multibody dynamics

In this post I'll cover how to simulate a multibody system (a "robotic arm") using the Simmechanics toolbox in Simulink, which is an extension of Matlab.

We'll build a simple "robotic arm" with 3 degree of freedom (DOF). Each DOF will be rotational and will be actuated by a "servomotor", which will be implemented as a closed loop PID position controller.

We won't build this one in this tutorial, as it requires too many steps. We'll build something simple to illustrate the method, then you can build this one on your own. 

I won't give you the final .mdl file, instead I'll give you all the necessary steps, so you can learn by doing.

OK, let's go hands on!

The environment


First, let's explore the environment. Launch Matlab and then open Simulink, either by using the command simulink in the command line or by clicking the simulink icon in the toolbar.

Launching Simulink

The Simulink Library Browser will open, here you'll find a bunch of building blocks that can be used to assemble Simulink models. We'll be using the first generation or legacy Simmechanics blocks located under the Simscape library. After you find these blocks, create a new model by clicking the blank page icon.

Starting a new simulink model

A new blank window, name untitled, will appear. This is the simulink model, we can drop blocks here to build models, which can later be simulated. You'll notice there is a play button which is disabled, that button starts the simulation.

A blank Simulink model...

Let's start by dropping a Ground block in the model, I'll explain what it does soon enough. You can find the Ground block inside the Bodies category of the Simmechanics blocks. Drag the Ground block and drop it inside the white are of the Simulink model.

Gaining ground on Simulink.

The coordinate system


Simulink uses an XYZ Cartesian coordinate system to describe the position of the bodies and Euler angles to describe the orientation of the bodies. Let's take a look at the global coordinate system (CS) by starting a simulation.

First, head to the menu > Simulation > Configuration Parameters. On the new window, go under the Simmechanics 1G (or simply Simmechanics) category and enable the animation by checking the "Show animation during simulation" checkbox.

Enabling animation.

Click the apply button and close the window. Now hit the play button (Start simulation). In the new window that pops out, select the isometric view as shown in the next image.

The Coordinate System and an empty animation.

You just did your first animation, there is nothing in it but the global coordinate system. Now, notice that the Y axis is pointing up, this is also the axis where the gravity acts (in the -Y direction). Some people, me included, tend to draw the Z axis pointing up and use the -Z direction for the gravity. Simulink doesn't follow this Z convention, so be careful.

The multibody paradigm: bodies and joints


As the name implies, multibody systems are composed of various bodies, where a body can be any rigid piece of matter. Two bodies are connected by joints, these joints allow one or more DOF (i.e. relative movement) between the bodies.

Most multibody system can be described as "open chains", i.e. as a series of bodies and joints that form a line or a tree, but not a loop. In Simmechanics, these chains must start with the Ground block, the Ground is a body with infinite mass and moment of inertia. Let's explore the Ground block by double-clicking it.

Ground block parameters

The Ground block is located at some [x, y, z] global position. This point is where other bodies will make a joint to the Ground. Leave the default [0, 0, 0] position.

The simplest example: A pendulum


To better understand the joint and body system, let's start by building a simple pendulum system. Add a revolute block, located under the Joints category, and a body block, located under the Bodies category, to the Simulink model. Then, link these block by click dragging a line from one block to another, the final diagram should look like the following image.

Pendulum diagram.

Let's add parameters to the Body block. The Body will be a 1 meter zero-thickness bar with a mass of 1 Kg. Double click the Body block and modify the parameters to match the following image.

Bar parameters.

Click apply and close this window. Now change the simulation time to 2 (seconds) and hit the play button. On the new window, click the "Enable automatic expanding fit" button to take a better view at the pendulum movement.

Simulating a pendulum.

Analyzing the pendulum


Now that we have a visual, I'll proceed to explain how the Coordinate Systems (CS) works.

The pendulum CSs.

Let's look at the big picture, we have the Ground, which is our reference point for this kinematic chain and is located at [0, 0, 0]. Next we have a Body (the bar) with two CSs (Coordinate Systems), each CS is attached to one particular point of the body as you can see.

The Ground and the Body are connected by a Revolute block, which is a joint. A joint is a relationship between two CS, one CS for each intervening body. The joint add restrictions between these two CS, because in 3D space an unrestricted CS has 6 DoF with respect to another CS. In our example the Revolute joint only allows 1 rotational DoF in the Z axis direction ([0, 0, 1]). This means that CS1 can't translate with respect to the Ground, i.e. it will remain at the global position [0, 0, 0], and can only rotate around the global Z axis.

Let's now analyze the Body parameters. We have three Coordinate Systems: CS1, CS2 and CG. The CG is the center of gravity and the other two CS are for reference/positioning. To specify the position of any CS we need:
  • A first CS, which I'll call the rCS: reference Coordinate System
  • A second CS, which I'll call the oCS: orientation Coordinate System
  • A [x, y, z] distance vector.
The position of the CS will be at a distance [x, y, z] starting from the rCS and moving along the XYZ axes of the oCS.

These 3 parameter allow great flexibility but also can add some confusion. To simplify your life and mine, we'll stick to the following convention:
  • We'll use the World CS as the oCS.
  • We'll use CS1 as the rCS for every CS, except for CS1. For CS1 we'll use Adjoining** as the rCS.
  • We'll also refrain from rotating bodies, i.e. we won't use the orientation tab of the body parameters.
** Adjoining can only be used at a CS that is part of a joint, and it does reference to the other CS that is part of the joint.

The final parameter is the moment of inertia, which is expressed as a tensor. The moment inertia must be taken at the CG and is expressed along the XYZ axes of the CG. For this example I assumed a zero thickness bar, you can find the most common moment of inertia at wikipedia.

The robotic arm


The previous section, understanding the position and orientation system, was the hardest of this tutorial. Now we can add the two missing members of our "robotic arm". In fact, I'm gonna let you do that as a homework, but I'll provide some hints.

XYZ Robot Diagram.

The "Robotic Arm" is composed of 3 zero-thickness bars, each one measure 1 m and weights 1 Kg. Each bar initial position is oriented along the X, Y an Z axes respectively. The joints of the robot are all Revolute and allow rotation in the Z, X and Y axes as the figure above shows.

Below there is an animation that shows the initial position of the robot.

XYZ Robot Initial Position

You can change the color of the bodies in the Visualization tab inside the Block Parameters of each body.

Collapse under gravity


After you've finished configuring your blocks, proceed to simulate the system. You'll see the robot collapses under gravity.

XYZ Robot collapsing under gravity.

To solve this problem, we'll use some basic control theory. The basic blocks of a control system are: sensors, actuators and controllers.

Adding sensors and actuators


Simmechanics provides an easy way to add sensors and actuators to the system. Start by double clicking any of the joint blocks of the robot.
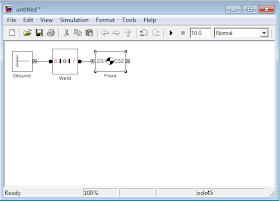
Enabling sensor / actuator ports.

Enable 2 sensor / actuator ports on each joint. Next, hook a Joint Sensor and a Joint Actuator, you can find both blocks under the Sensors and Actuators category, to each joint. Finally, connect the output of each sensor to a Scope block, you can find it under Simulink > Sinks Category.

XYZ Robot with sensors.

Simulate the system, and take a look at each Scope, you'll see how much each body rotates with respect to its base (or predecessor body). Take a close look at the animation and the scopes and relate the sign of each signal with the rotational axis to which is associated.

Z Joint
X Joint
Y Joint

Closing the loop


We already plugged both the sensors and the actuators, the only part missing is the controller. We'll add to controller to maintain the initial position of the XYZ Robots, so it doesn't collapses under gravity.

We'll need the following blocks: The PID Controller block, found under the Simulink > Continuous; the Sum block, found under Simulink > Math operations; and the Constant block, found under Simulink > Sources. You'll need to modify the Sum block parameters, so the List of Signs is: "|+-".

Configuring the Sum block for subtraction.

Next, you'll need to wire the new blocks as shown in the next figure.

XYZ Robot with PID blocks.

The final step is tuning the gains of each PID block. After some trial and error, I ended with the following gains:

P
I
D
N
Z Joint
185
282
14
239
X Joint
121
197
6
435
Y Joint
17
27
1
423

All that's left is to check the correctness of the controller by simulating the system.

XYZ Robot fighting gravity with its PID controllers.

Z Joint
X Joint
Y Joint

What's next? (Homework for you)


I hope this simple and unrealistic example had accomplished its mission of teaching you the fundamentals of the Simmechanic toolbox.

If you want to keep playing, you can immediately do the following:
  • Change the reference signals X, Y and Z from a constant 0 to some time varying signal, like a step or a sine wave. You'll notice soon enough the controller will start misbehaving because of the high non-linearity of the system.
  • Remove the gravity and see how that affects the performance of the controller when tracking a time varying reference. You'll need to insert a Machine Environment block and enable the Machine Environment port of the Ground block.
With some hard work you can do the following:
  • Implement a better model for the actuators (motors), by adding limits to the torque and speed, and also adding moment of inertia and friction to the joints.
  • Build a more realistic robot/system. Here, CAD software like Solidworks help a lot, because you can extract real information like distances, masses and moments of inertia. For example you can find the CAD files of the robot I've shown at the beginning of this post here. You can add more realistic rendering to your model using .STL files.
  • Implement a more robust controller using techniques like computed torque or fuzzy logic.
  • Study about forward (see Denavit-Hartenberg) and inverse (see iterative methods) kinematics and implement some trajectory tracking routines for your robot.

Once you've done that, you'll be closer to simulating a humanoid robot.